StepKit

KALLAX shelf unit 2x2

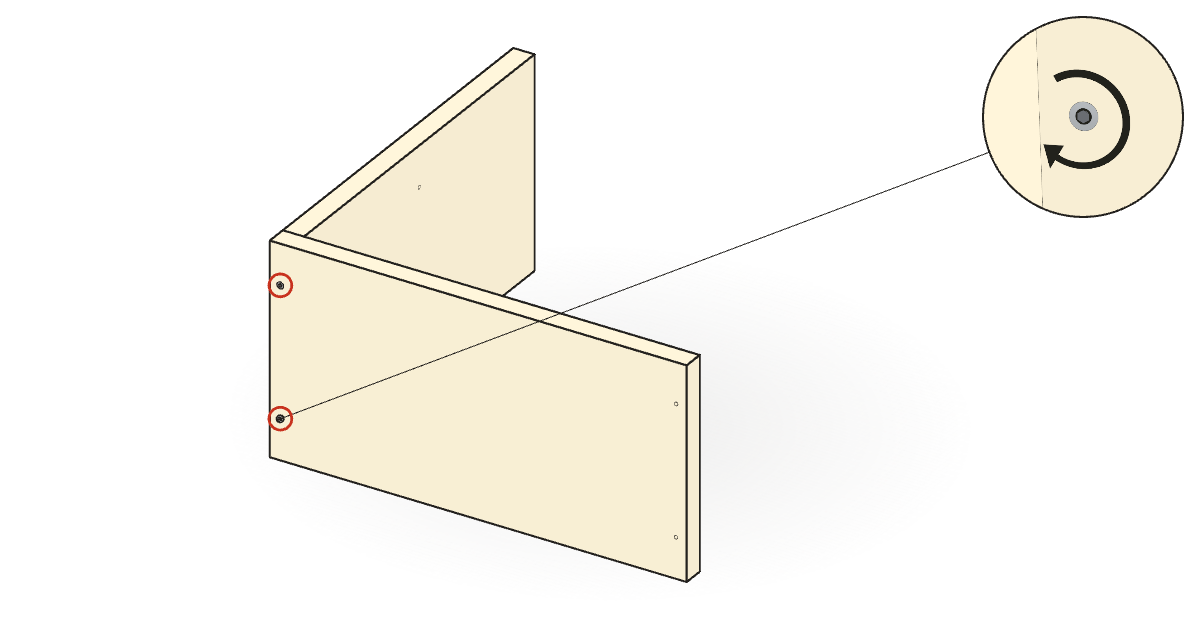
Step 1: Join two outer panels, shown in 3D.

1Join two outer panels

Manual step 1, page 12

Lay out one long outer panel and one short outer panel in an L, standing on their long edges. Using the hex key, drive 2 connector screws through the holes near the end of the long panel's outer face and into the end of the short panel.

You need
CountPartSize
1Long outer panel
1Short outer panel
1Hex key1000018 × 90 mm
2Connector screw1043217 × 70 mm

Something looks wrong with this step

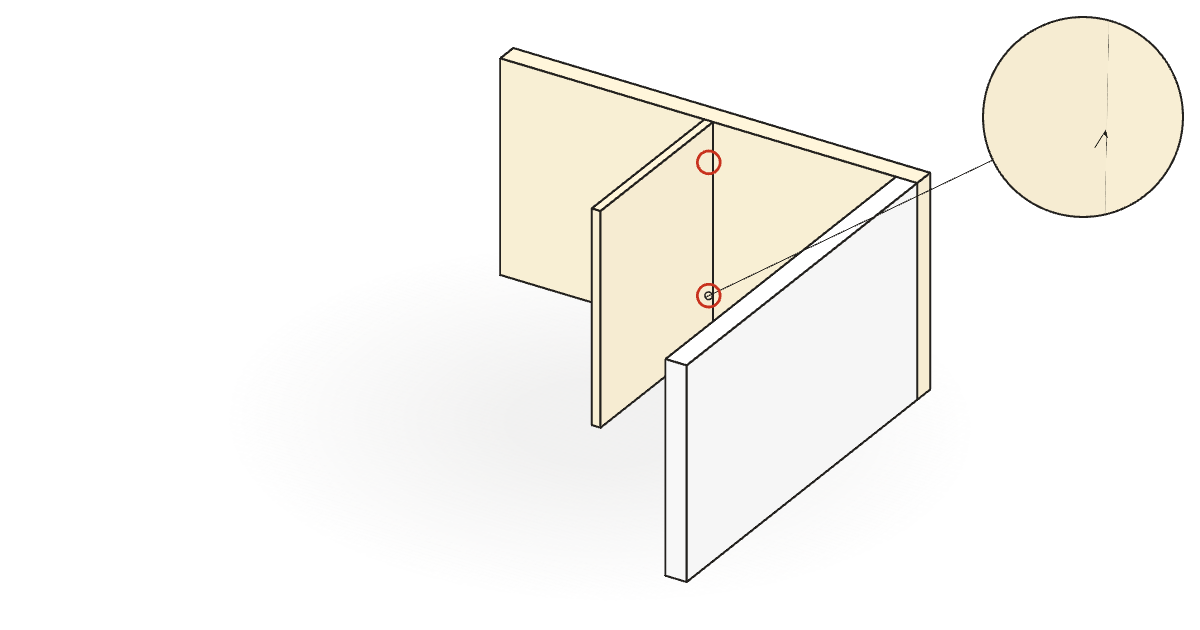
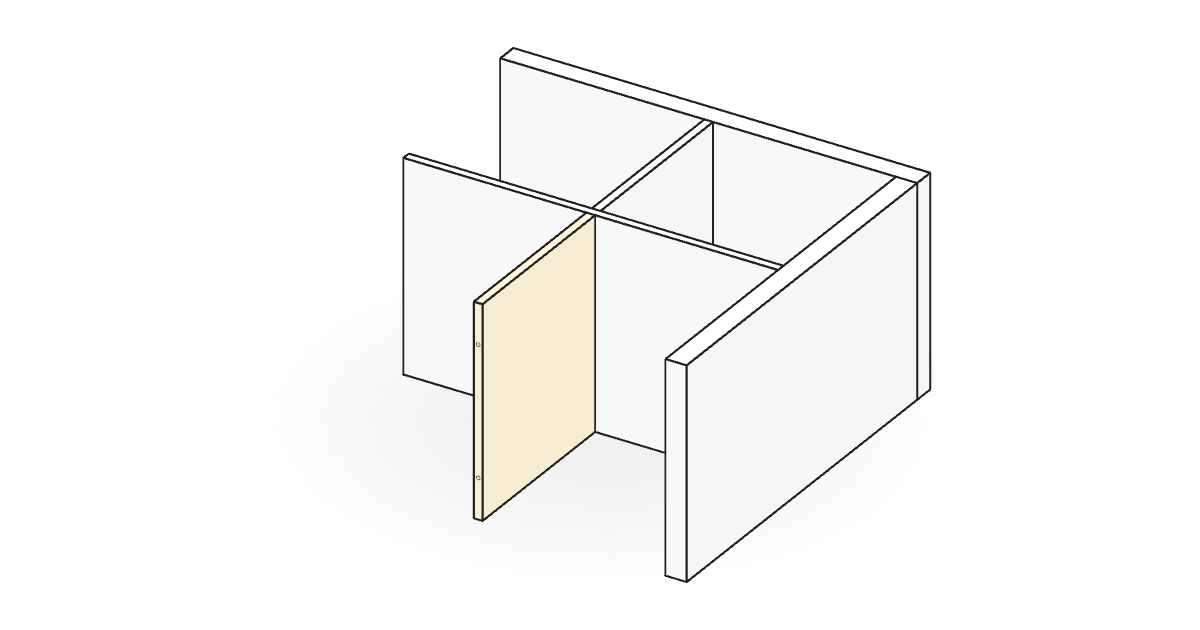
Step 2: Add the first short inner panel, shown in 3D.

2Add the first short inner panel

Manual step 2, page 13

Tap 2 dowels into the holes in the middle of the long outer panel's inside face. Push a short inner panel onto them.

Tip. It goes on the long panel, the one the screws went through, not on the short panel.

You need
CountPartSize
1Short inner panel
2Long dowel1013398 × 40 mm

Something looks wrong with this step

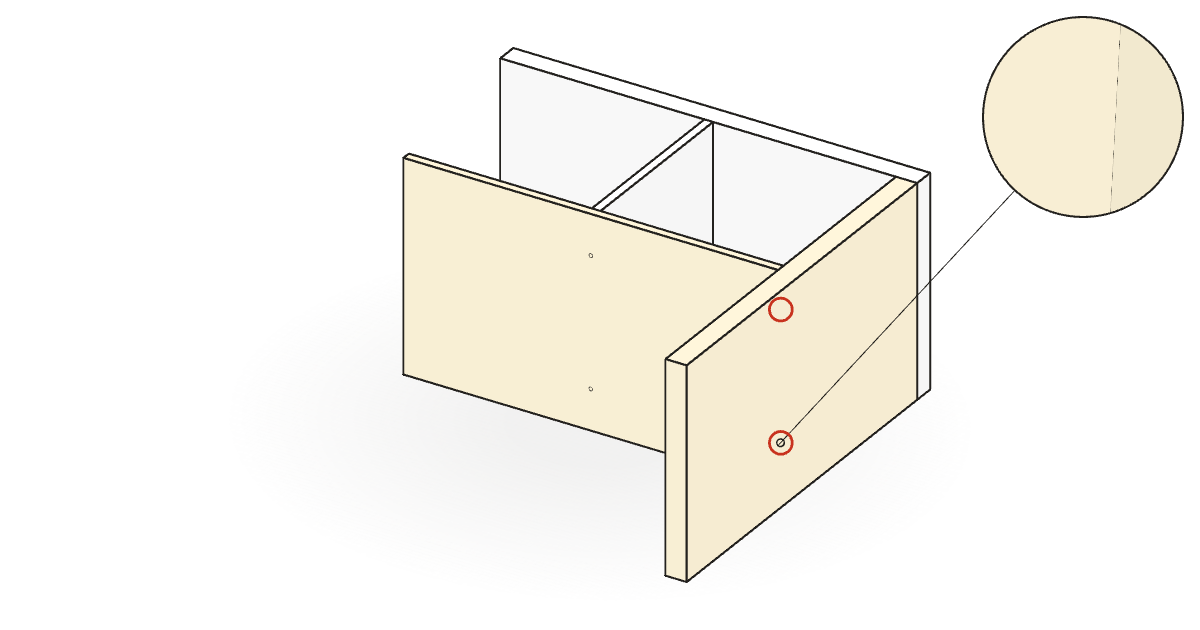
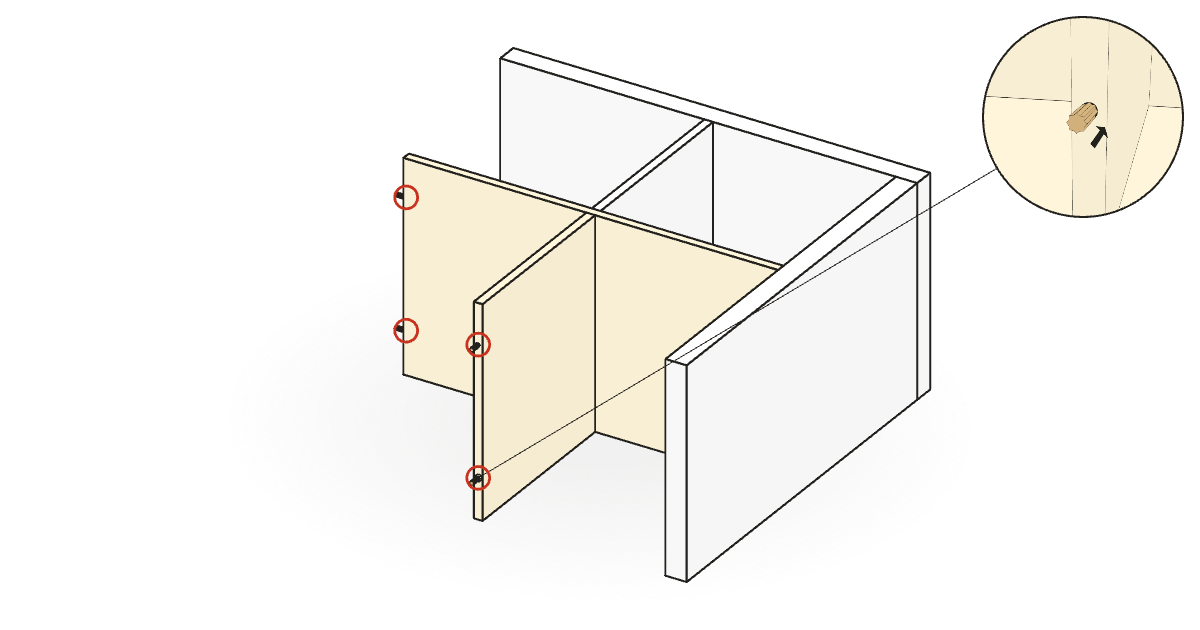
Step 3: Add the long inner panel, shown in 3D.

3Add the long inner panel

Manual step 3, page 14

Tap 2 dowels into the holes in the middle of the short outer panel's inside face. Push the long inner panel onto them, so it runs parallel to the long outer panel and meets the end of the short inner panel.

You need
CountPartSize
1Long inner panel
2Long dowel1013398 × 40 mm

Something looks wrong with this step

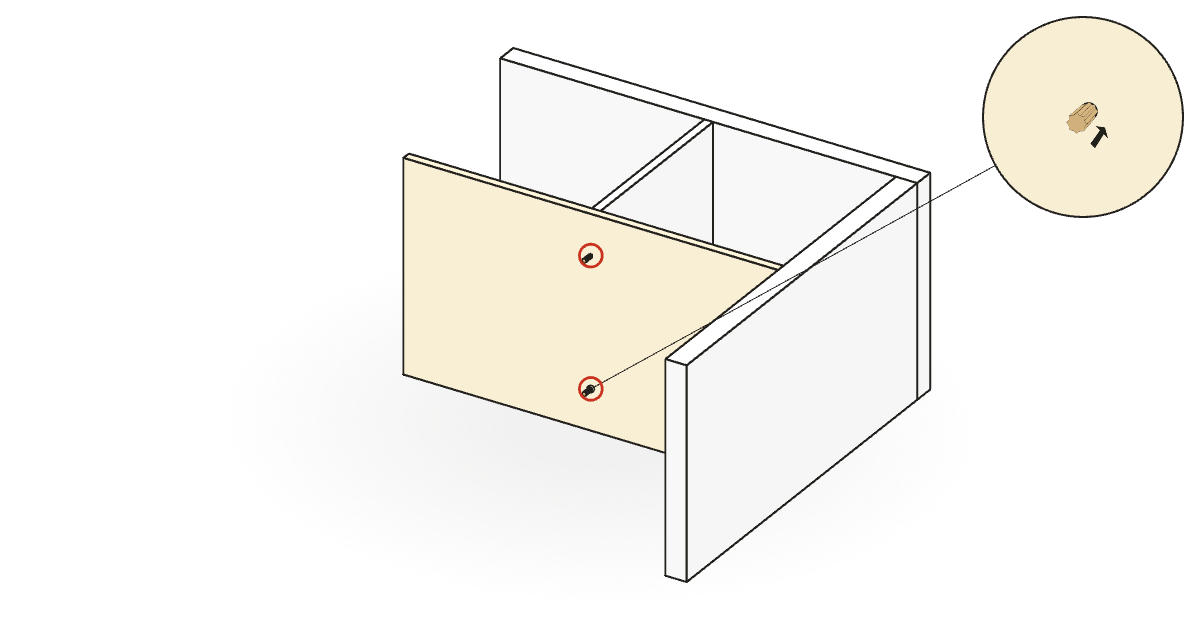
Step 4: Add dowels to the long inner panel, shown in 3D.

4Add dowels to the long inner panel

Manual step 4, page 15

Tap 2 dowels into the holes in the middle of the long inner panel's free face.

You need
CountPartSize
2Long dowel1013398 × 40 mm

Something looks wrong with this step

Step 5: Add the second short inner panel, shown in 3D.

5Add the second short inner panel

Manual step 5, page 16

Push the second short inner panel onto those 2 dowels, in line with the first one, to make a cross.

You need
CountPartSize
1Short inner panel

Something looks wrong with this step

Step 6: Add dowels to the cross, shown in 3D.

6Add dowels to the cross

Manual step 6, page 17

Tap 2 dowels into the free end of the long inner panel and 2 into the free end of the second short inner panel.

You need
CountPartSize
4Long dowel1013398 × 40 mm

Something looks wrong with this step

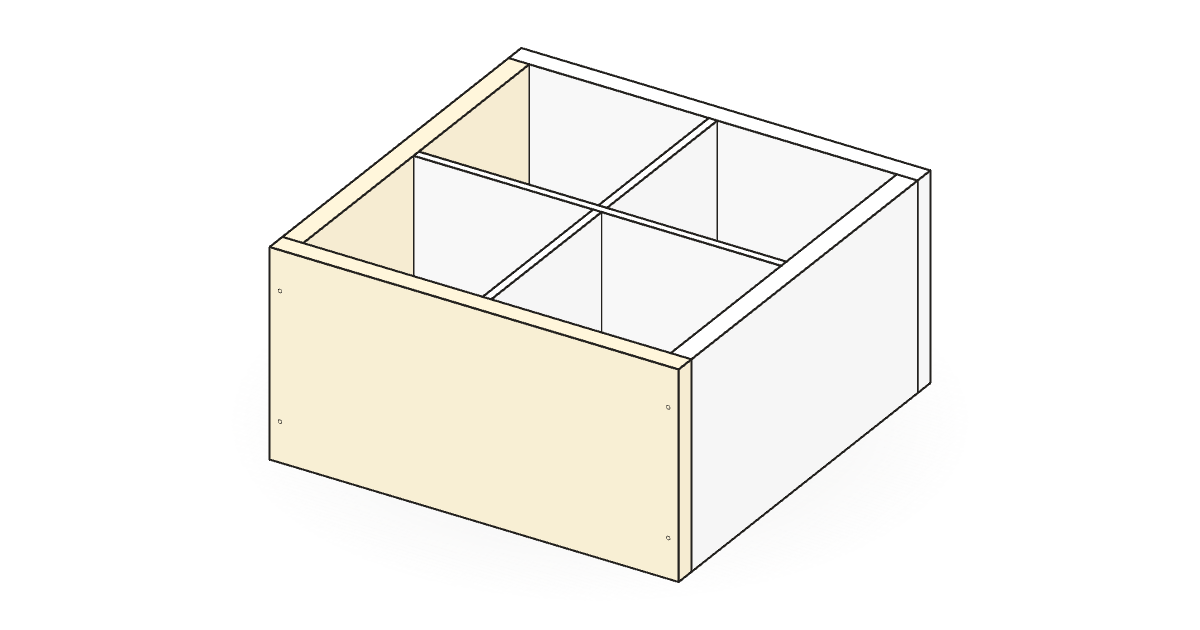
Step 7: Close the frame, shown in 3D.

7Close the frame

Manual step 7, page 18

Push the second short outer panel onto the end of the long inner panel, then the second long outer panel onto the end of the short inner panel. The holes in the short panel's ends must face the long panels.

You need
CountPartSize
1Short outer panel
1Long outer panel

Something looks wrong with this step

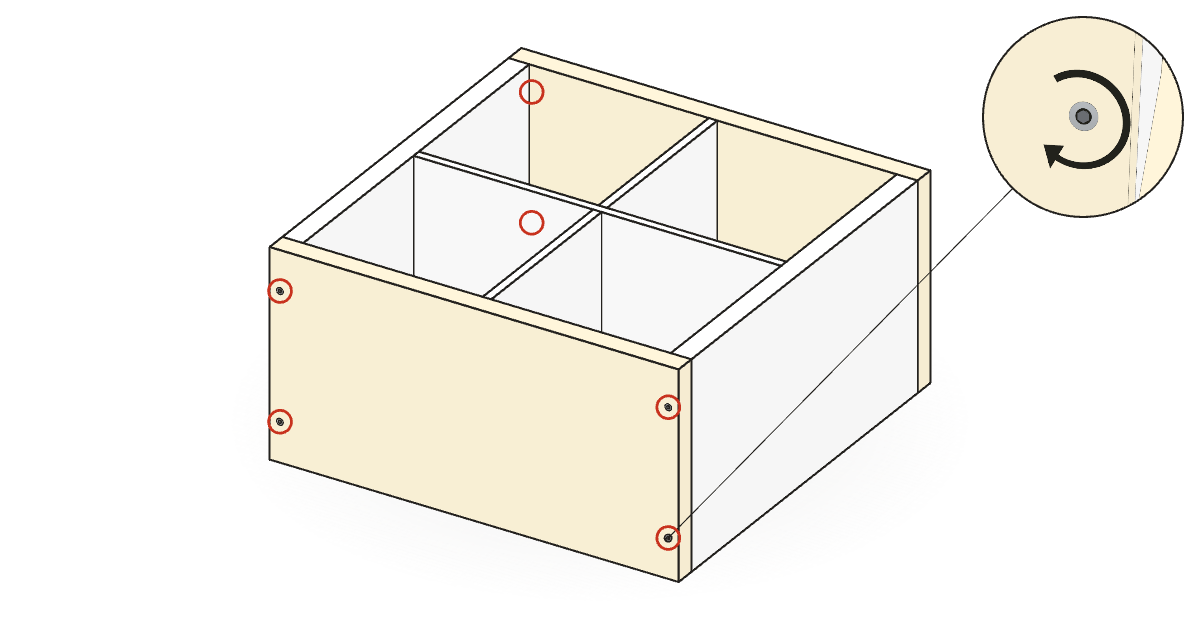
Step 8: Screw the frame together, shown in 3D.

8Screw the frame together

Manual step 8, page 19

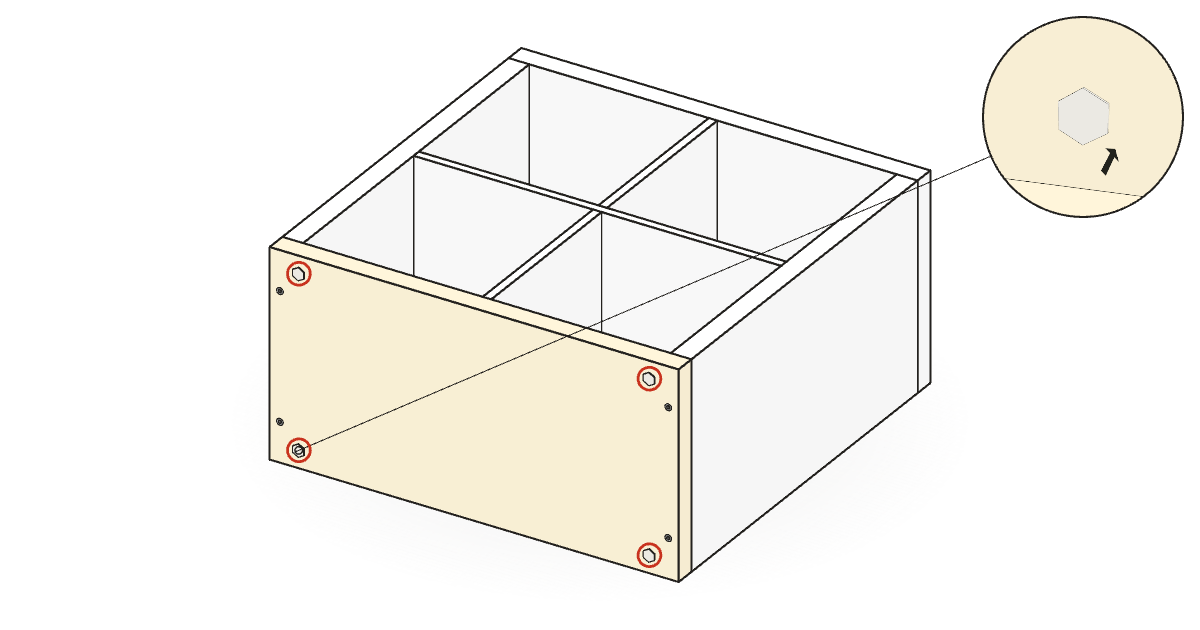
Using the hex key, drive the last 6 connector screws through the long outer panels and into the ends of the short outer panels, 2 at each of the 3 open corners.

You need
CountPartSize
6Connector screw1043217 × 70 mm

Something looks wrong with this step

Step 9: Stick on the felt pads, shown in 3D.

9Stick on the felt pads

Manual step 9, page 20

Peel 4 felt pads off the sheet and stick one on each corner of the outer face of the long outer panel you added last. That panel is the bottom.

Tip. This guide covers standing the unit on the floor. Hanging it on the wall takes a different order of steps.

You need
CountPartSize
4Felt pad1000230025 × 2 mm

Something looks wrong with this step

Step 10: Fit the wall brackets, shown in 3D.

10Fit the wall brackets

Manual step 10, page 21

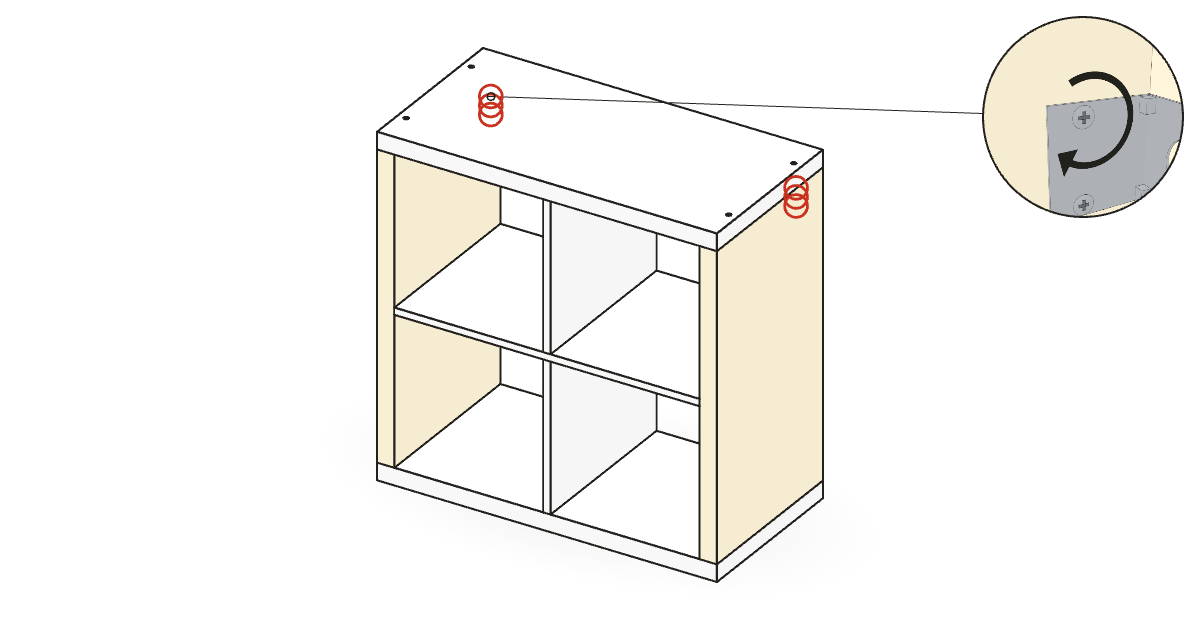
Stand the unit up. Inside each top corner cell, at the back, screw a wall bracket to the side panel with 2 screws.

Furniture can tip over and cause serious or fatal crushing injuries. Fix it to the wall with the brackets supplied. Wall screws are not included; use ones suited to your wall.

You need
CountPartSize
4Bracket screw1003726 × 16 mm
2KALLAX wall bracket11575350 × 60 mm

Something looks wrong with this step

Step 11: Mark the wall, shown in 3D.

11Mark the wall

Manual step 11, page 22

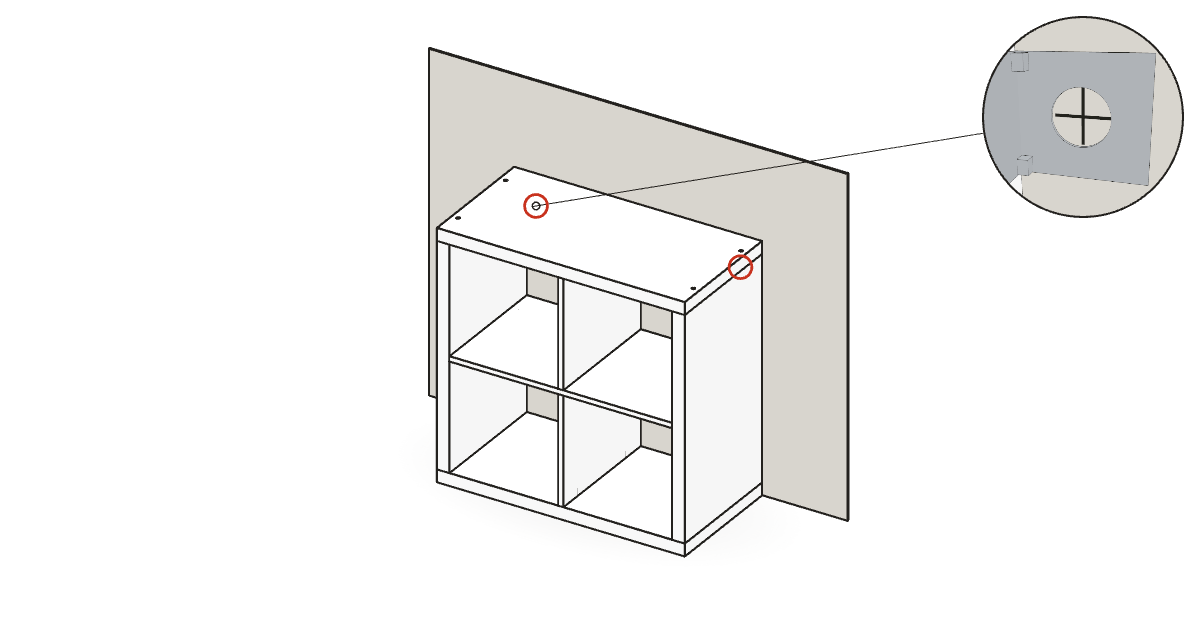
Push the unit against the wall where it will stand. With a pencil, mark the wall through the big round hole in each bracket.

Something looks wrong with this step

Step 12: Fit your wall screws, shown in 3D.

12Fit your wall screws

Manual step 12, page 23

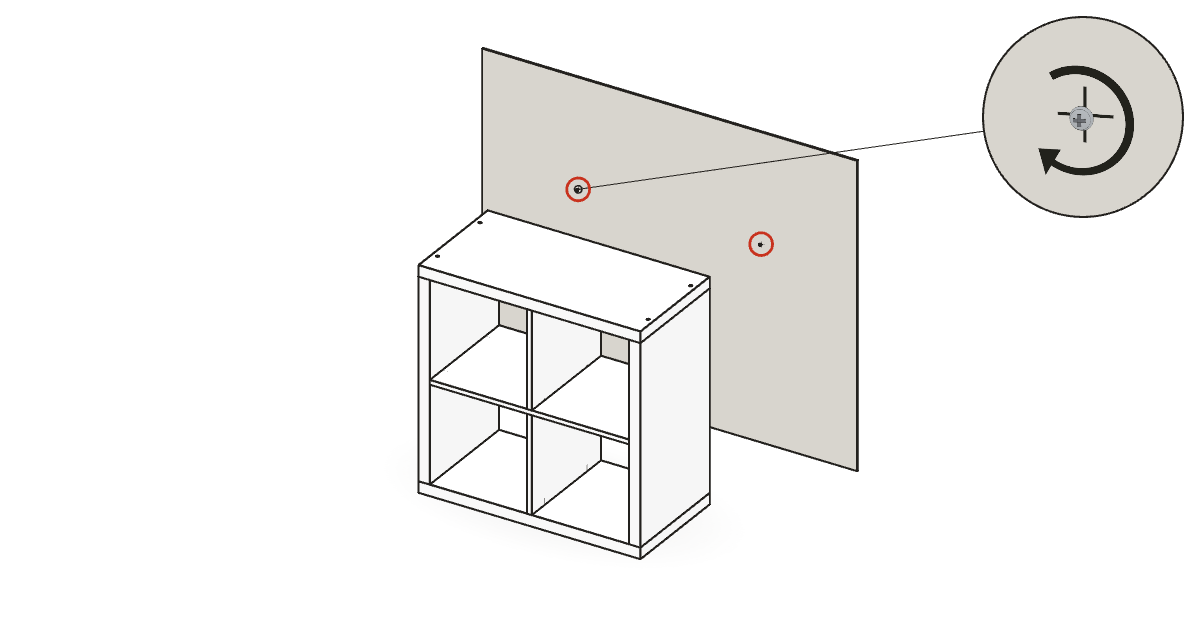
Move the unit away. Drive a screw suited to your wall into each mark, leaving the head standing clear of the wall. Wall screws are not included.

Something looks wrong with this step

Step 13: Fix it to the wall, shown in 3D.

13Fix it to the wall

Manual step 13, page 24

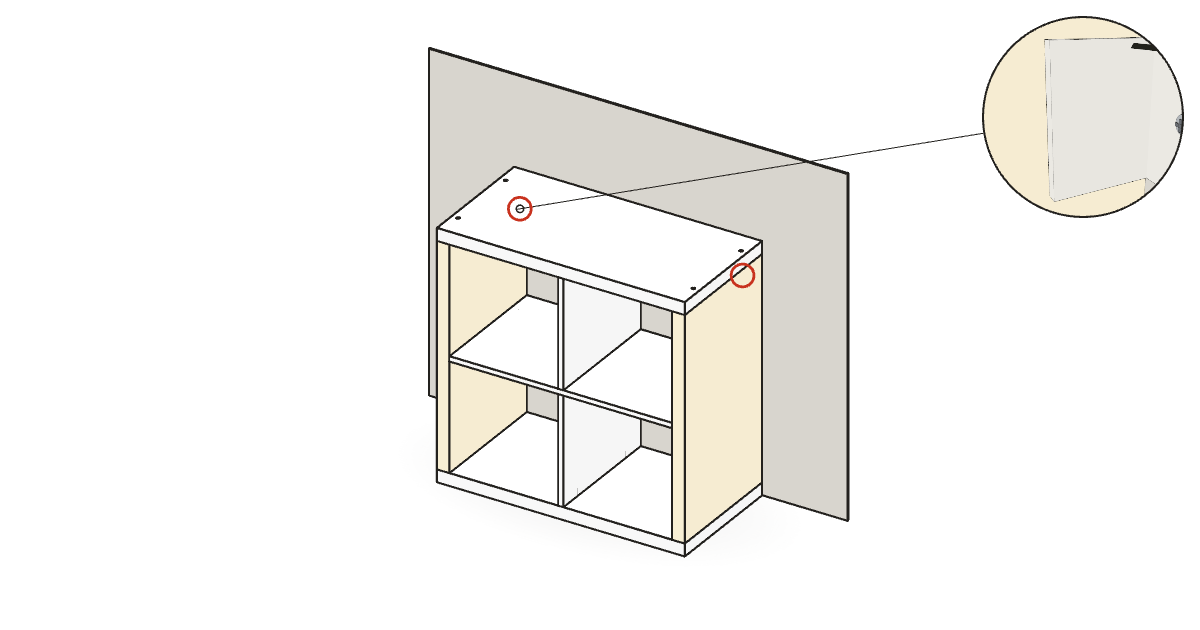
Hang a wall plate on each wall screw and push the unit back so each plate slides into its bracket. Tighten each wall screw through the bracket's hole with a screwdriver, then push a cover over each bracket.

Furniture can tip over and cause serious or fatal crushing injuries. Fix it to the wall with the brackets supplied. Wall screws are not included; use ones suited to your wall.

You need
CountPartSize
2Wall plate10369330 × 45 mm
2Bracket cover11575455 × 65 mm

Something looks wrong with this step

Tools, manual and notes
Everything in the box
CountPartSize
2Long outer panel
2Short outer panel
2Short inner panel
1Long inner panel
1Hex key1000018 × 90 mm
4Bracket screw1003726 × 16 mm
10Long dowel1013398 × 40 mm
2Wall plate10369330 × 45 mm
8Connector screw1043217 × 70 mm
2KALLAX wall bracket11575350 × 60 mm
2Bracket cover11575455 × 65 mm
4Felt pad1000230025 × 2 mm

Tools

  • Flat screwdriver
  • Phillips screwdriver
  • Pencil
  • Hammer
  • Spirit level

Article numbers: 206.316.39 (white), 706.373.04 (black-brown), 206.372.93 (white stained oak effect).

Your booklet should say AA-2703308-1 on its last page. If it says something else, this guide may not match your box.

IKEA's official manual (PDF)

Board sizes are approximate. Reports go to .

Checked against IKEA manual AA-2703308, revision 1: right boards, right faces, right order, right counts. Board sizes are approximate.