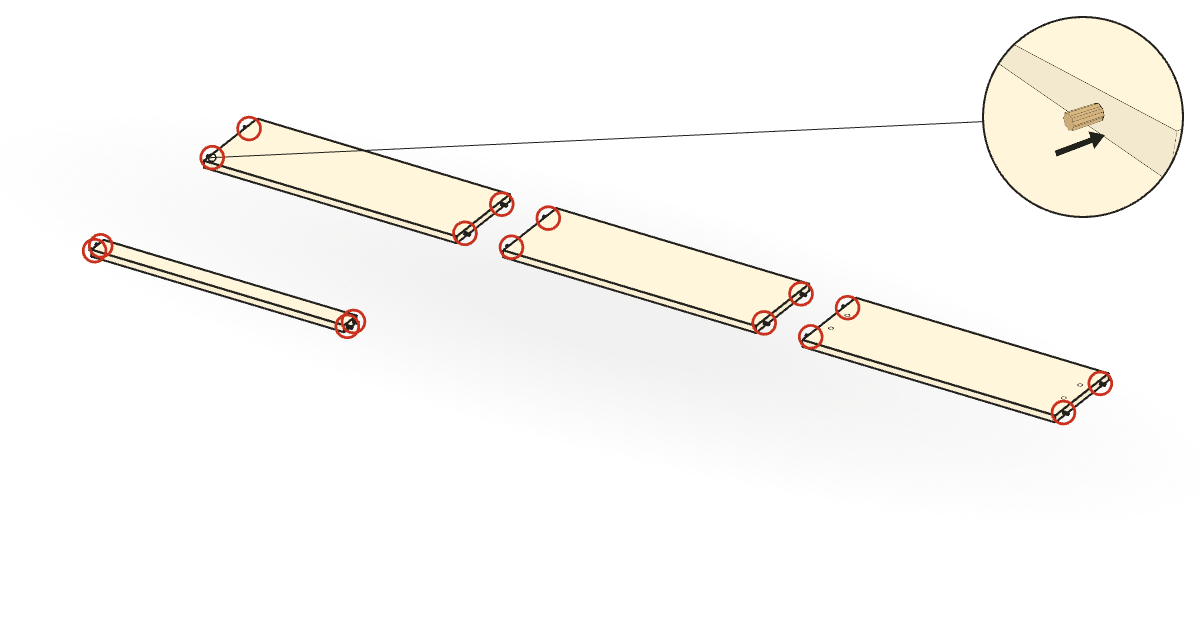
1Fit dowels into the boards
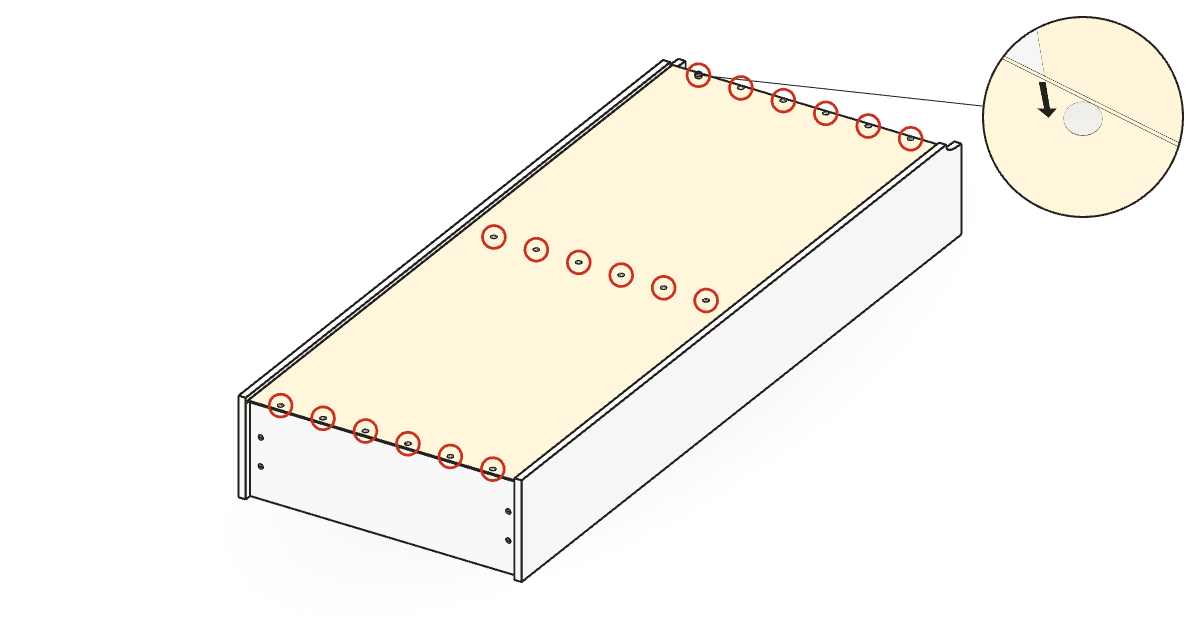
Push a wooden dowel halfway into each hole in the ends of the bottom, the fixed shelf, the top and the kick plate. Tap gently with a hammer if a dowel is tight.
| Count | Part | Size |
|---|---|---|
| 16 | Wooden dowel101351 | 8 × 30 mm |
Manual page 7
3D is not available on this device. The written steps still work.
Push a wooden dowel halfway into each hole in the ends of the bottom, the fixed shelf, the top and the kick plate. Tap gently with a hammer if a dowel is tight.
| Count | Part | Size |
|---|---|---|
| 16 | Wooden dowel101351 | 8 × 30 mm |
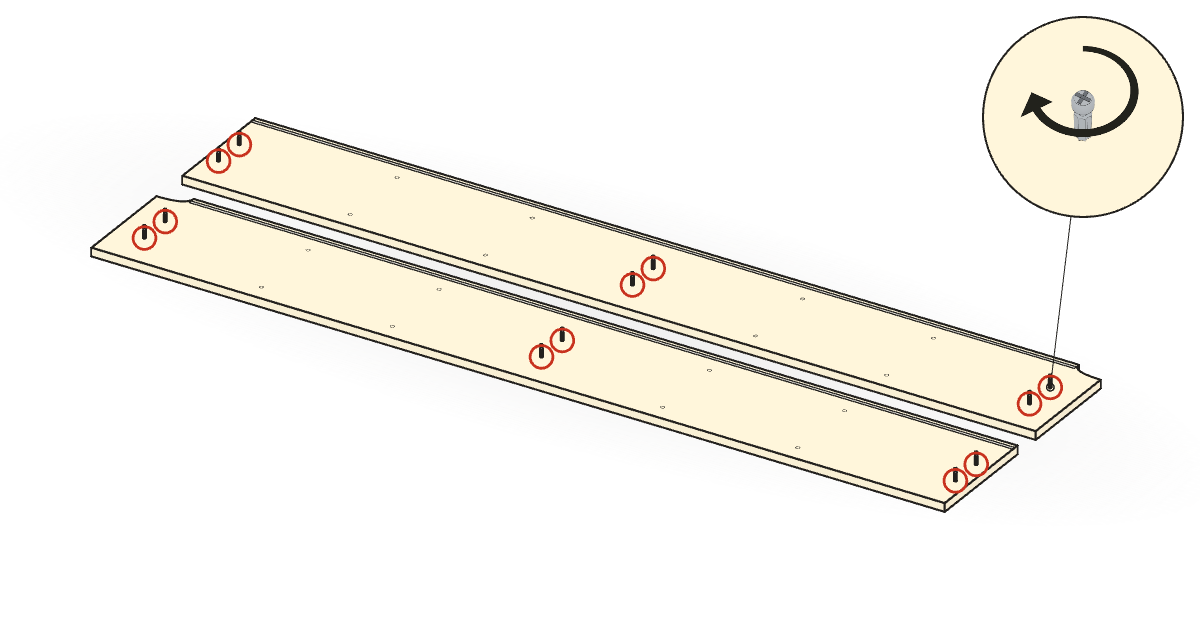
Screw a cam bolt into each of the 12 holes on the inside faces of both side panels until only the neck and head stick out.
| Count | Part | Size |
|---|---|---|
| 12 | Cam bolt118331 | 6 × 40 mm |
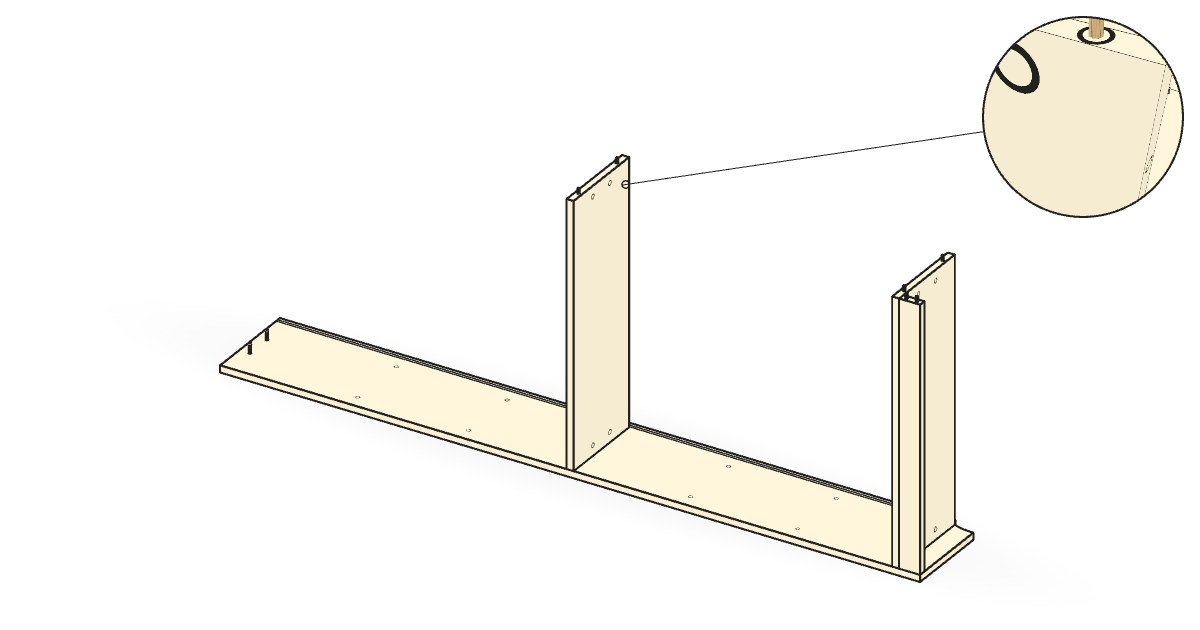
Lay one side panel flat, cam bolts up. Push on the bottom, kick plate and fixed shelf. On the bottom and fixed shelf, the small edge holes face the side panel's grooved edge, and the big round holes face the kick plate end.
| Count | Part | Size |
|---|---|---|
| 1 | Side panel | |
| 1 | Bottom | |
| 1 | Kick plate | |
| 1 | Fixed shelf |
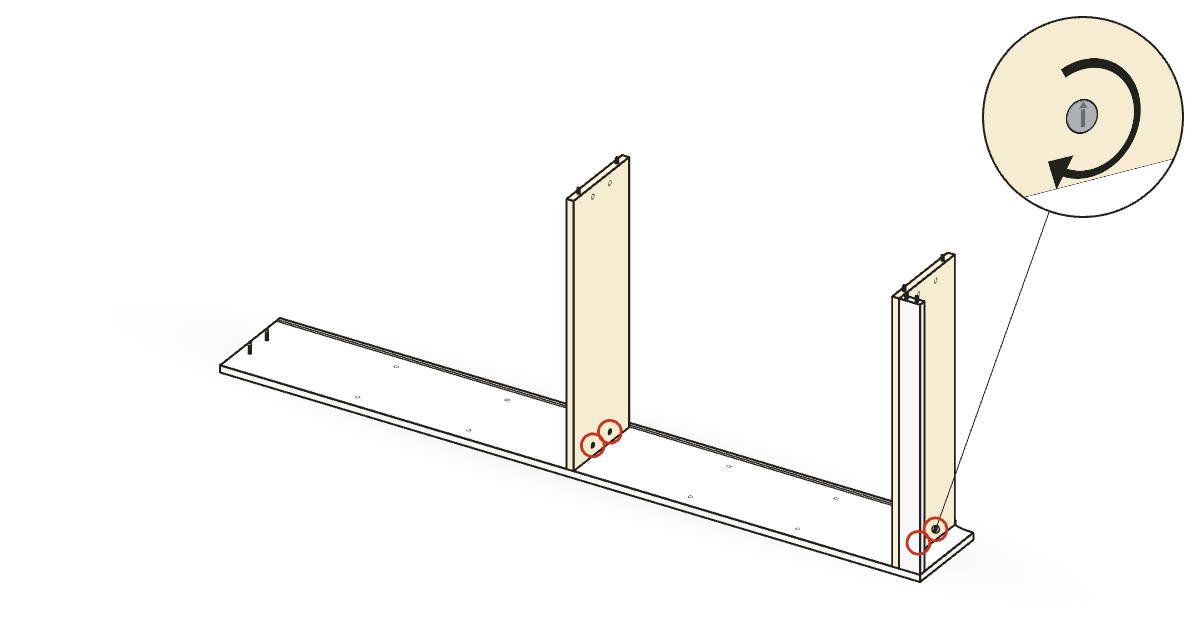
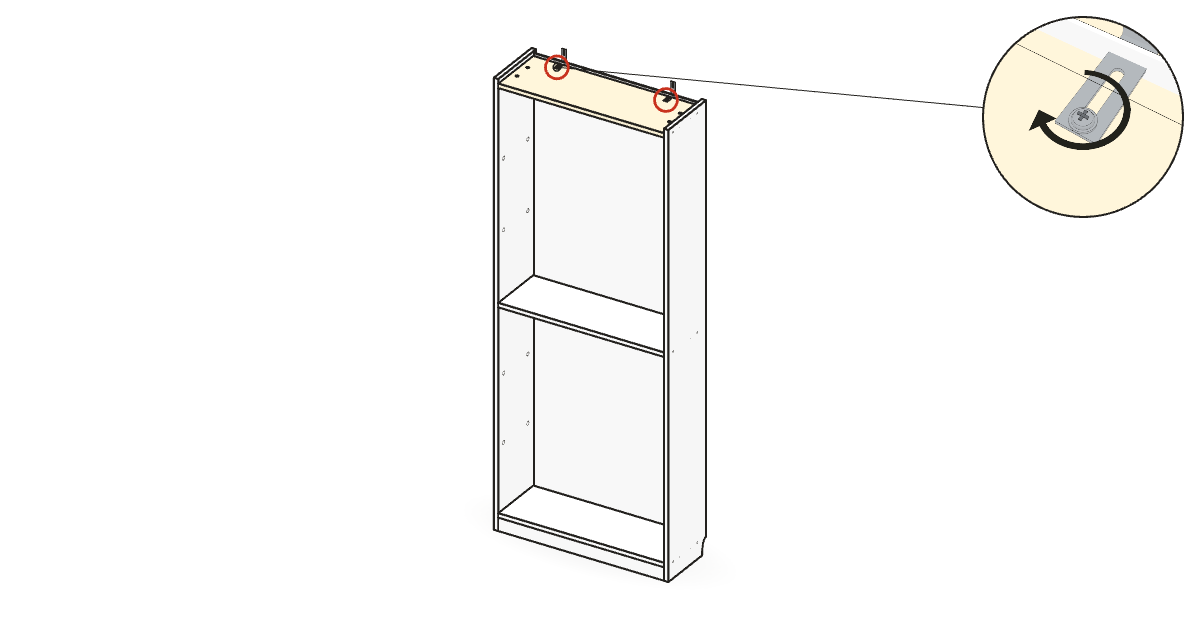
Put a cam lock into each of the 4 round holes next to the side panel, arrow pointing toward the cam bolt, and turn it half a turn clockwise until it pulls tight.
| Count | Part | Size |
|---|---|---|
| 4 | Cam lock119081 | 15 × 12 mm |
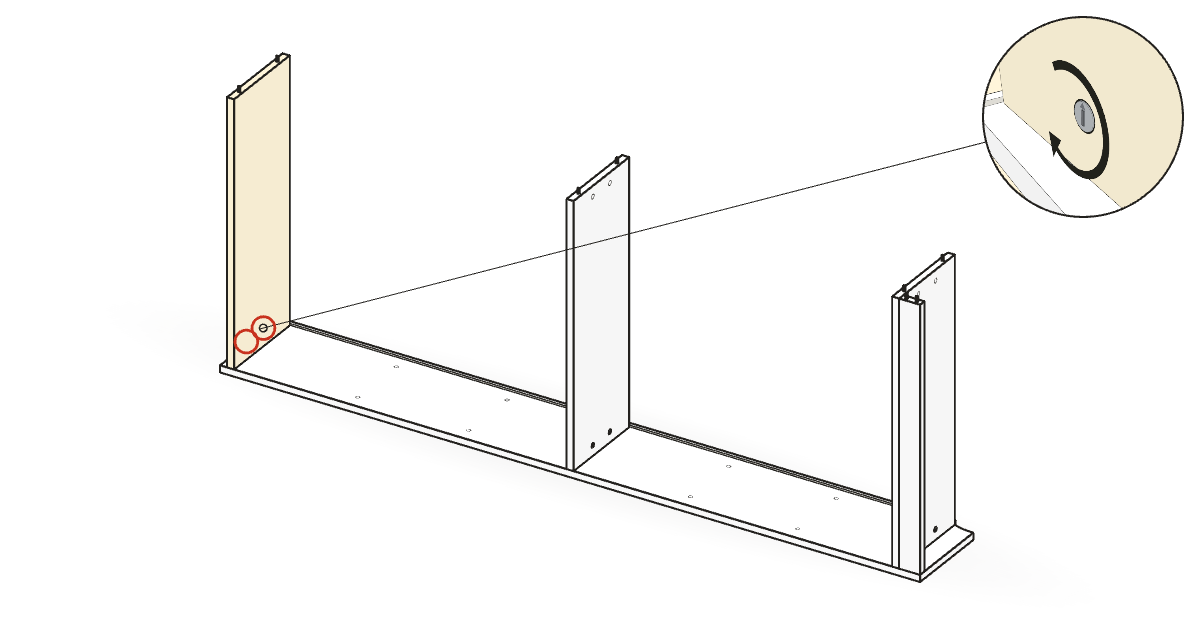
Push the top onto the far end of the side panel. Its small edge holes face the grooved edge; its big round holes face outward, away from the fixed shelf. From outside, add 2 cam locks, arrow toward the cam bolt, and turn each half a turn clockwise.
| Count | Part | Size |
|---|---|---|
| 1 | Top | |
| 2 | Cam lock119081 | 15 × 12 mm |
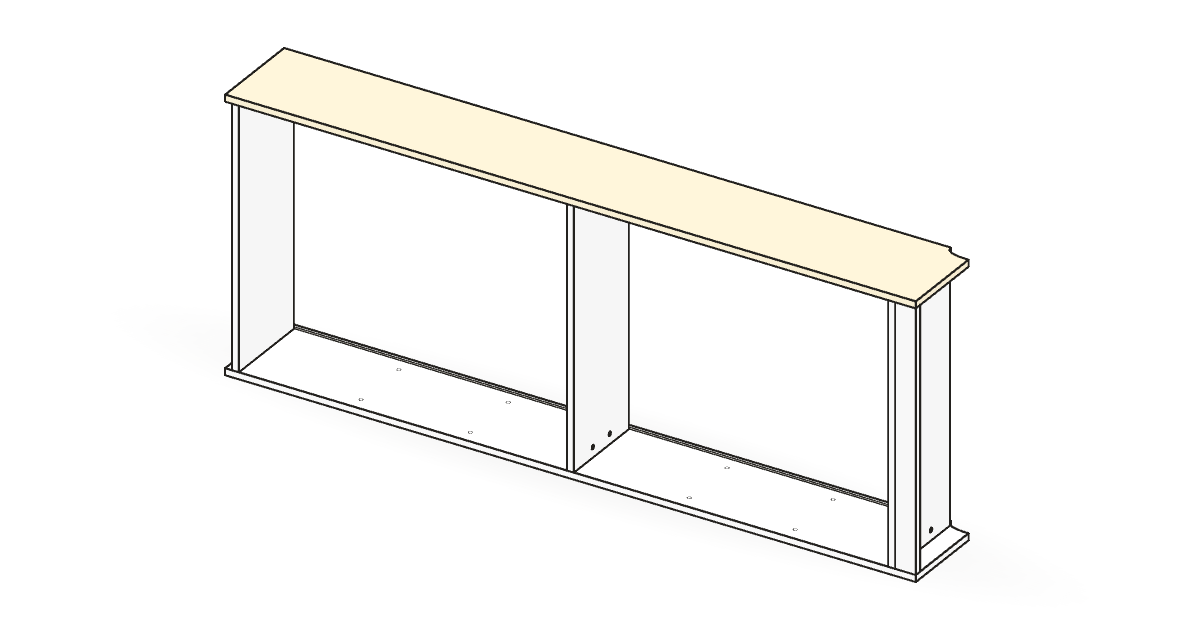
Lower the second side panel onto the dowels, with its cam bolts going into the boards next to the round cam lock holes.
| Count | Part | Size |
|---|---|---|
| 1 | Side panel |
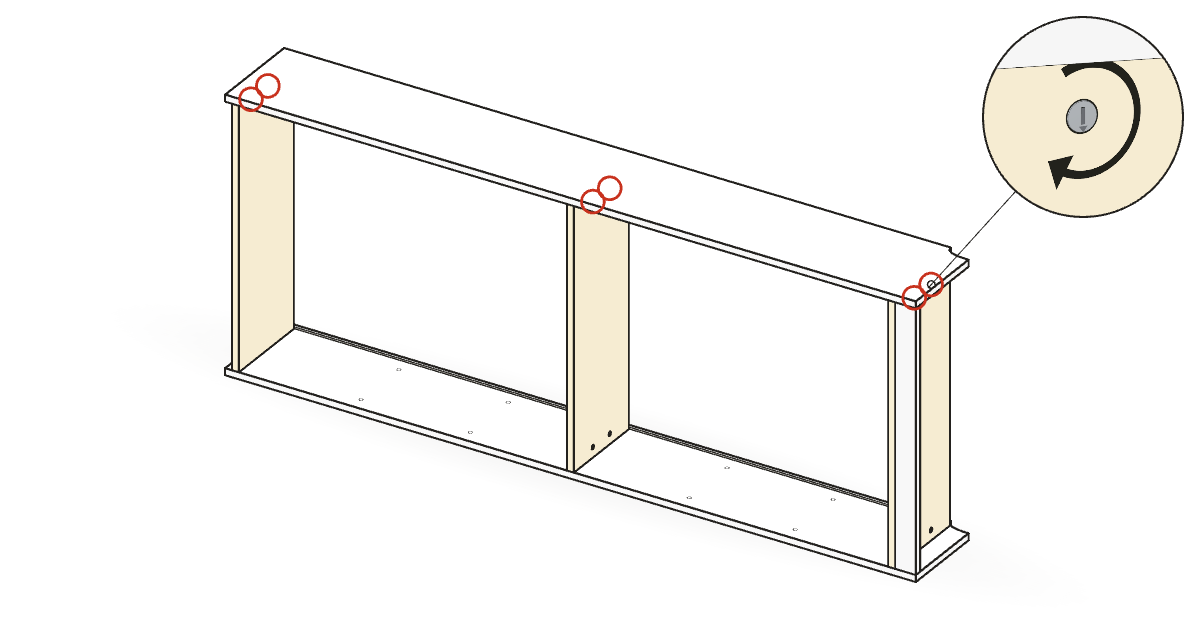
Put a cam lock into each of the 6 round holes next to the second side panel, arrow pointing toward the cam bolt, and turn each half a turn clockwise until it pulls tight. The top's locks go in from the outside.
| Count | Part | Size |
|---|---|---|
| 6 | Cam lock119081 | 15 × 12 mm |
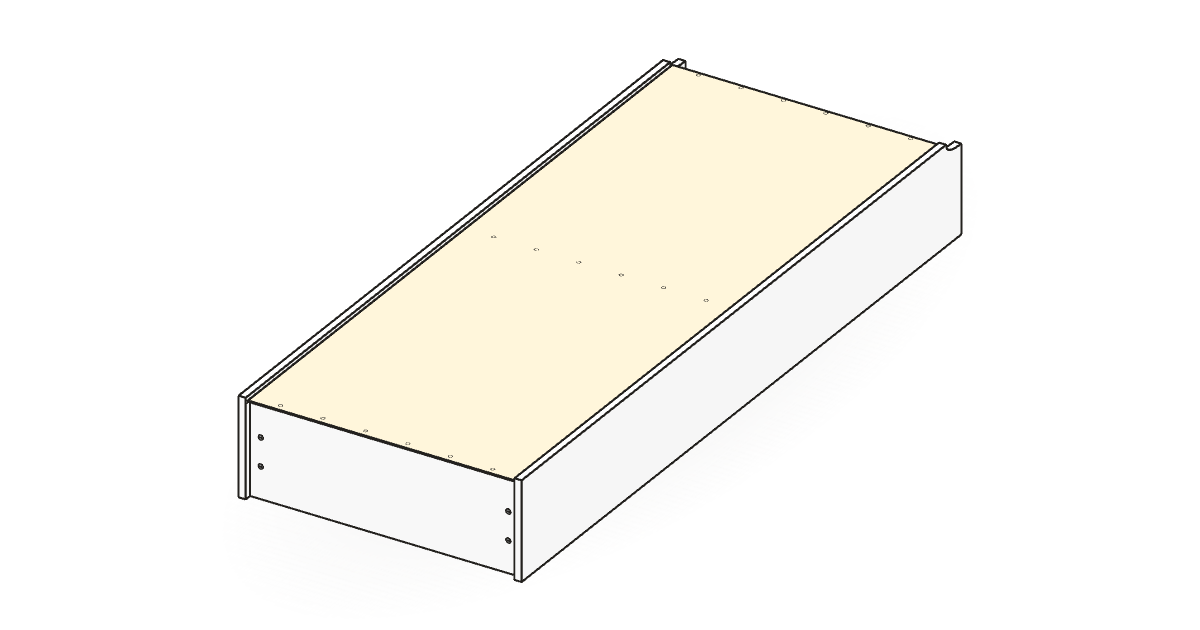
Turn the bookcase face down. Fold the back panel along its crease and slide it into the grooves from the notched end of the side panels, until it covers the whole back.
| Count | Part | Size |
|---|---|---|
| 1 | Back panel |
Push a plug through each of the 18 holes in the back panel, then tap a nail cap into each plug.
| Count | Part | Size |
|---|---|---|
| 18 | Nail cap151705 | 16 × 17 mm |
| 18 | Plug151706 | 8 × 15 mm |
Stand the bookcase up against the wall. Fix each wall bracket to the top with a washer and a screw. Then fix each bracket to the wall with a washer and a screw suited to your wall.
Furniture can tip over and cause serious or fatal crushing injuries. Fix it to the wall with the brackets supplied. Wall screws are not included; use ones suited to your wall.
| Count | Part | Size |
|---|---|---|
| 4 | Washer100823 | 12 × 1.5 mm |
| 2 | Wall bracket106989 | 20 × 60 mm |
| 2 | Screw109041 | 4 × 20 mm |
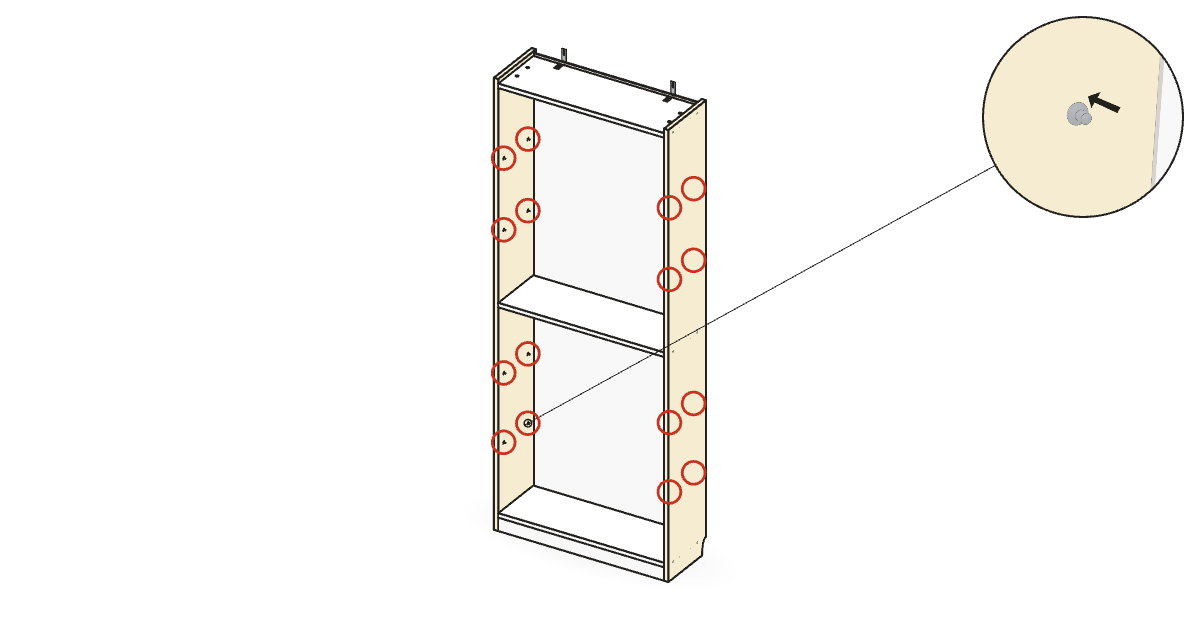
Push 4 shelf pins into the side panel holes at each height where you want a shelf, all 4 at the same level.
Tip. The heights shown are an example; any matching set of 4 holes works.
| Count | Part | Size |
|---|---|---|
| 16 | Shelf pin131372 | 5 × 16 mm |
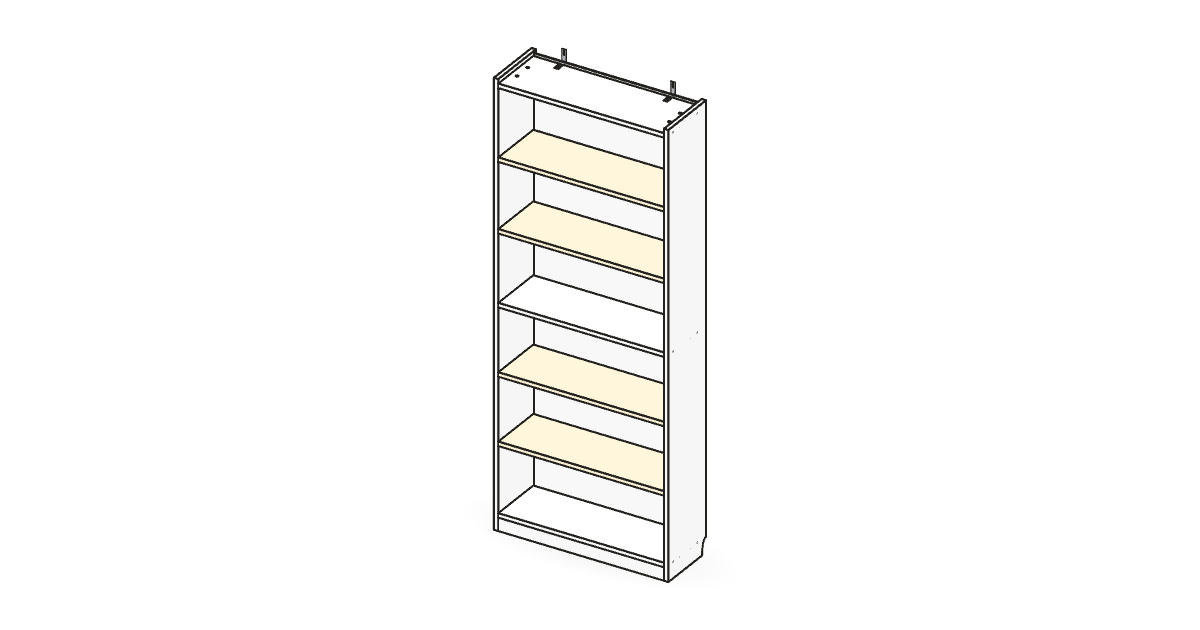
Lay each shelf on its 4 shelf pins.
| Count | Part | Size |
|---|---|---|
| 4 | Shelf |
| Count | Part | Size |
|---|---|---|
| 2 | Side panel | |
| 1 | Bottom | |
| 1 | Fixed shelf | |
| 1 | Top | |
| 1 | Kick plate | |
| 1 | Back panel | |
| 4 | Shelf | |
| 4 | Washer100823 | 12 × 1.5 mm |
| 16 | Wooden dowel101351 | 8 × 30 mm |
| 2 | Wall bracket106989 | 20 × 60 mm |
| 2 | Screw109041 | 4 × 20 mm |
| 12 | Cam bolt118331 | 6 × 40 mm |
| 12 | Cam lock119081 | 15 × 12 mm |
| 16 | Shelf pin131372 | 5 × 16 mm |
| 18 | Nail cap151705 | 16 × 17 mm |
| 18 | Plug151706 | 8 × 15 mm |
Article numbers: 205.220.46 (white), 404.773.40 (black oak effect), 505.086.52 (brown walnut effect), 105.089.32 (oak effect).
Your booklet should say AA-2289108-3 on its last page. If it says something else, this guide may not match your box.
Board sizes are approximate. Reports go to help@wizardindustries.app.
Checked against IKEA manual AA-2289108, revision 3: right boards, right faces, right order, right counts. Board sizes are approximate.
StepKit counts visits and how many builds start and finish, with no accounts or cookies. Counts go to Umami, an analytics service. This device remembers when you started a guide.
Not affiliated with IKEA. Product names are trademarks of Inter IKEA Systems B.V.